Jeroen's Project Journals
Concrete subwoofer
Remix of a subwoofer design by Youtuber Hexibase. This version is printed hollow and filled with concrete
- Gallery
Introduction
2023-12-17
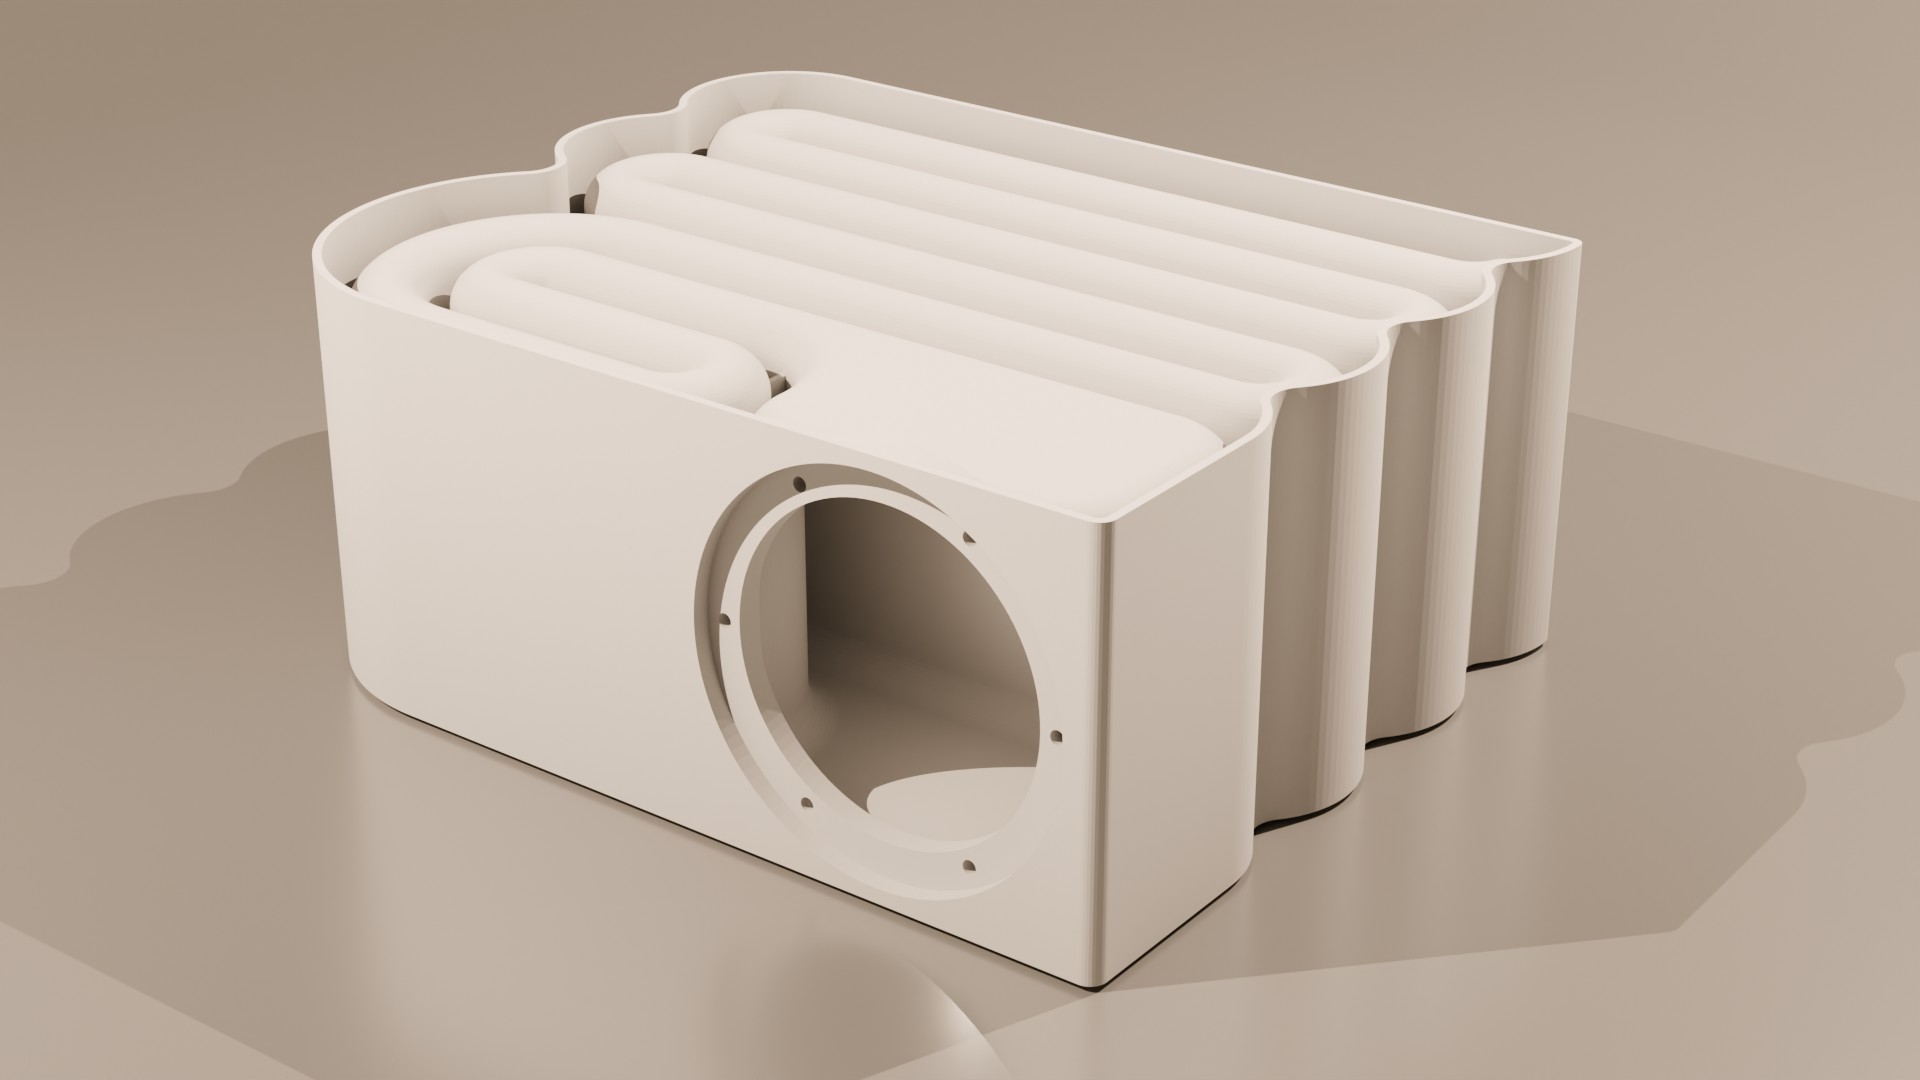
A few years ago YouTuber HexiBase built several versions of a 3D printed subwoofer using the Tang Band W3-1876S 3” subwoofer driver. These designs take a very long time to print, and in the end you still end up with a plastic subwoofer enclosure. So I made a version of his design that is hollow on the inside to make it print much faster. It can then be filled with concrete, plaster or something else that is pour-able. In June 2023 Youtuber DIY Perks posted a video where he did the same thing with a speaker of his own design. His tip was to use plaster of paris with PV glue mixed in, which is what I ended up doing.
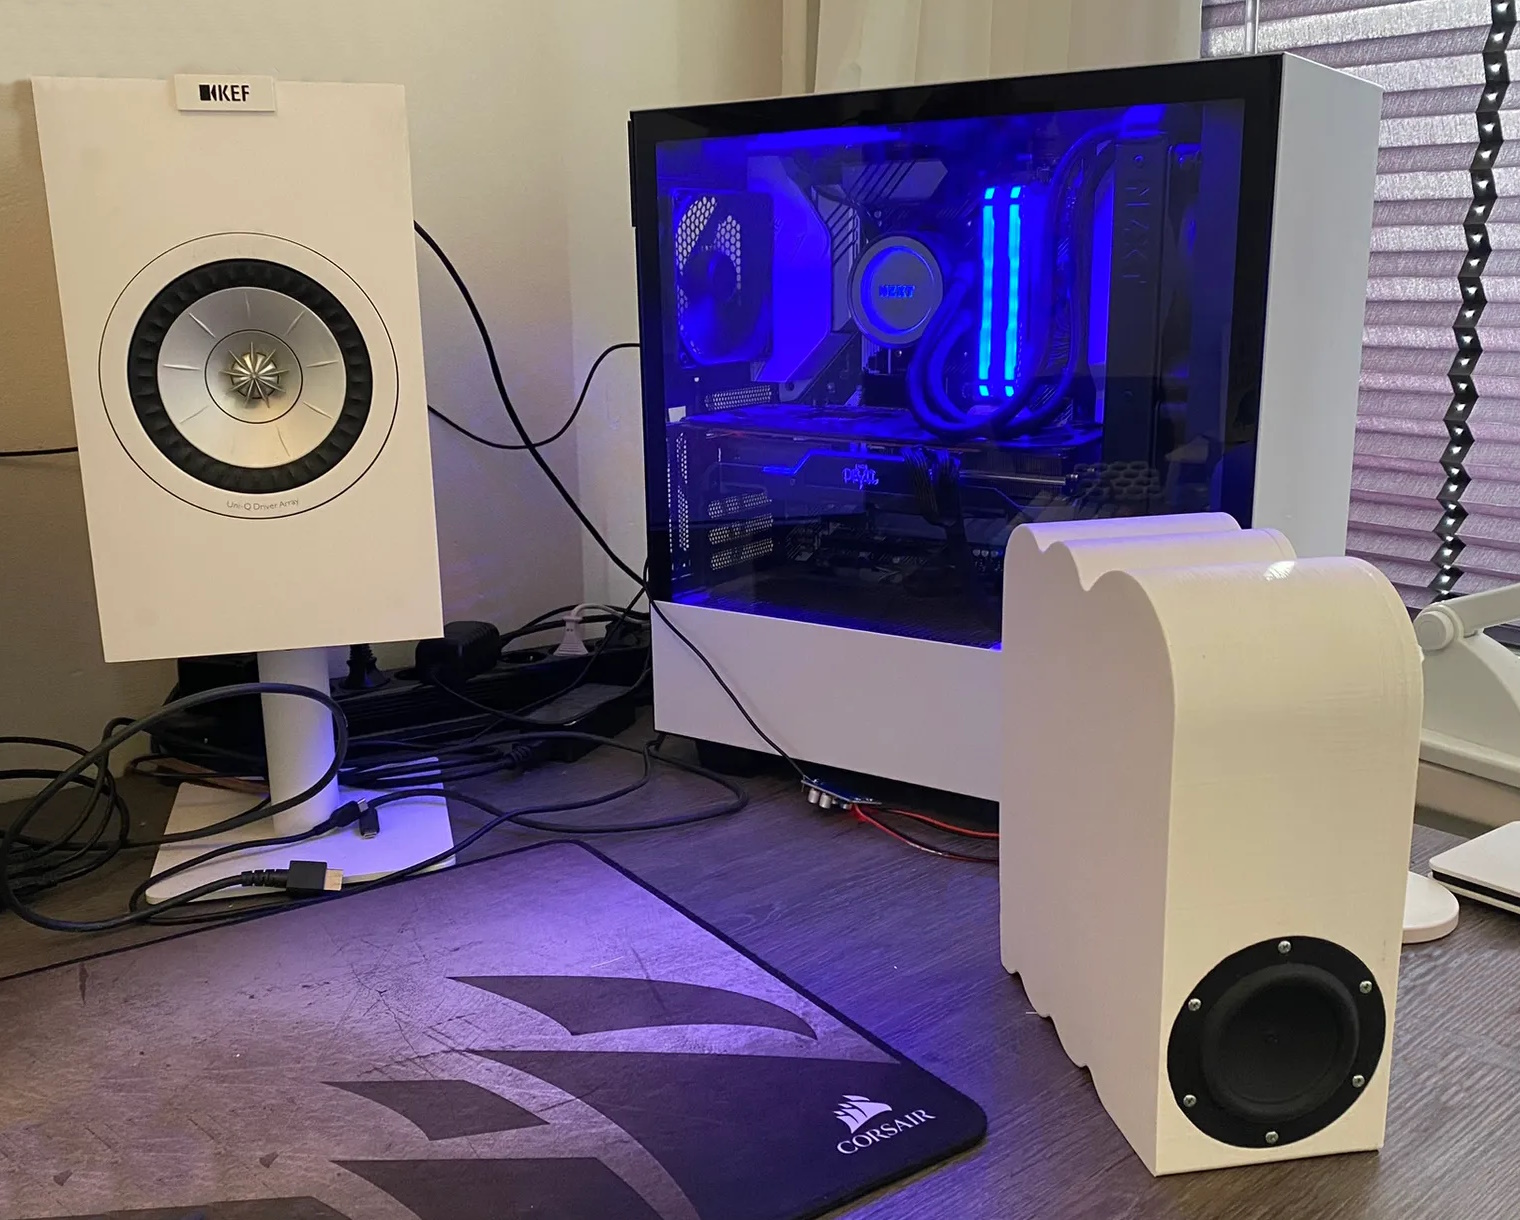
When I set it up alongside the KEF Q150’s I have, even with just a PC-side crossover (Windows’ speaker setup has this option), I was immediately rewarden by a pleasant, tight bass.
Printing
Printing this was pretty nerve-wrecking. It’s the longest print I ever did, so I really did not want this one to fail. Unfortunately, during printing one of the tree-supports detached from the bed. I hastily super-glued it back in place, rendering a small part of the print-sheet forever unusable. Also, the round shape of the waveguide leads to extreme overhangs near the top. This resulted in some minor spaghetti, which is not the end of the world, but this interfered with printing the outer perimeters, which weakened the layer-bonding of the outside walls. This resulted in it cracking in a couple of places while handling it, and I repaired that with some super-glue as well.
All that is to say: This is far from the cleanest print I’ve ever done.
Assembly
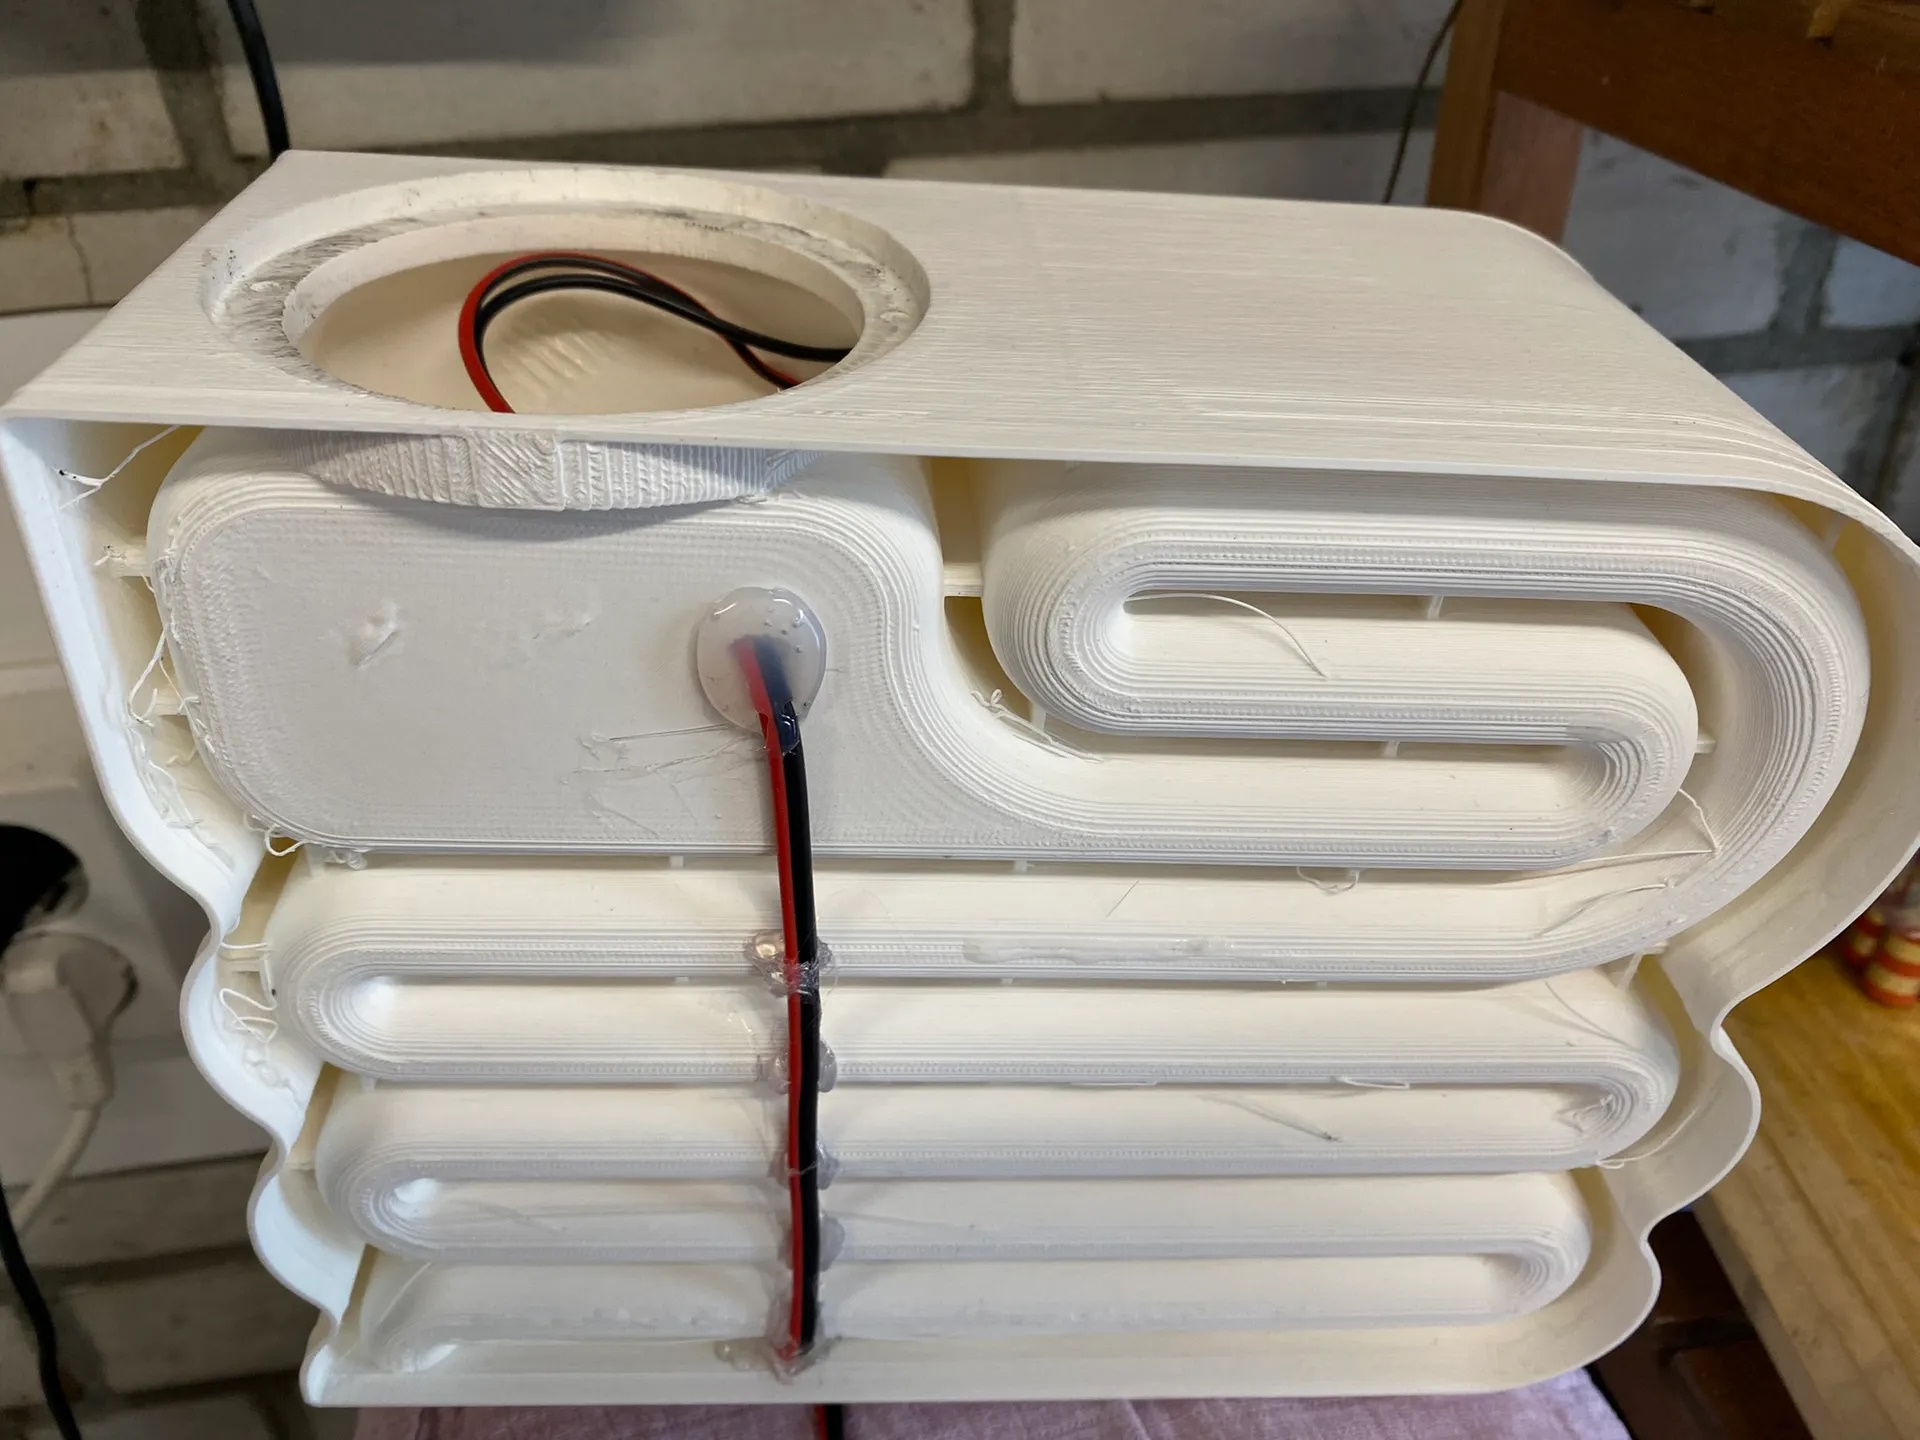
After the print completed, I drilled a couple of holes just big enough for the speaker-wire in the bottom of the coupling chamber and through the backside. Then I simply hot-glued the wire in place to keep it below the rim of the side-walls:
For the pour I used Modulan 105 Modelling plaster from Hornbach, which is very cheap (just €3,39 for a 1.5kg bag, which was more than enough). I mixed the powder with a bit more water than recommended (about 750 ml of water for 1 kg of plaster instead of the recommended 600 ml) and then added about 125g of PVA-glue.
Pouring got pretty messy, but I was prepared for that. First I poured about a third of the batch into the enclosure, making sure to hit each compartment. Then I placed the enclosure on a wooden board, at an angle, and used an orbital sander to create vibrations, which forced most air-bubbles to the surface. Then I poured the remainder of the plaster until the enclosure was filled to the brim and vibrate everything some more until no more bubbles appeared.

This plaster becomes rigid fairly quickly, but actual hardening takes at least 8 hours. It got surprisingly warm while curing, and it releases quite a lot of moisture in the process. Once the plaster had cured I soldered the wires to the speaker and screwed it in place using M3 screws and hex-nuts

Companion project
I am also working on a 4-channel USB DSP+DAC to properly match the sub with my KEF Q150’s and a 3-channel amplifier to make actual sound.